| WHAT
YOU HAVE TO DO |
|
STEP
|
ACTION
|
|
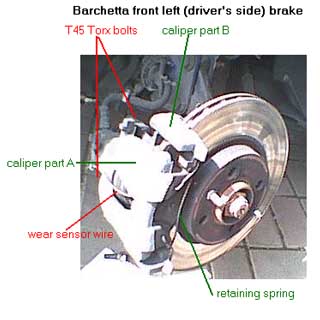
The
steps below use this diagram for visiual reference to parts
|
|
|
1
|
Undo
the brake fluid reservoir cap. If your fluid level is at or near the maximum
level, it¹s likely fluid will be pushed out when the caliper pistons are
pushed in place a cloth around it to catch any (it eats paint, remember).
|
|
2
|
Apply
handbrake, chock the rear wheels, and jack up the car. Remove front wheels.
Start at the left (driver¹s side) wheel this one has the brake wear-sensor. |
|
3
|
Clean
the caliper with aerosol brake cleaner (put a cloth immediately underneath
to avoid making a mess) avoid breathing any dust. It may not contain asbestos,
but it still won¹t do you any good. |
|
4
|
Unplug
the wear-sensor, and pull it backwards to slide if off it¹s mounting. |
|
5
|
Prise
off the retaining spring beware, it might fly off! |
|
6
|
Use 2 flat screwdrivers between the disk and the edges of the inner brake
pad to slowly push back the piston be careful not to damage the dust cover. |
|
7
|
Prise off the 2 plastic caps, and undo the bolts that secure the caliper
halves together you¹ll need a T45 Torx socket. |
|
8
|
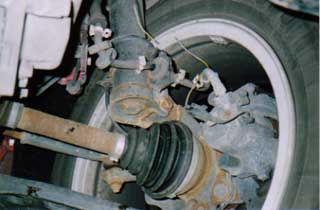
Wriggle
off the caliper. This is a bit tricky as the inner brake pad has a 3 pronged
clip that fits inside the piston. Once removed, do NOT allow the caliper
to hang from the brake pipe either hang it up using a piece of wire, or
put it on top of the disk. Remove the outer pad. |
|
9
|
Scrape
off all the caked-on dirt, and lubricate the edges of the pads where they
contact the caliper. Also lubricate the prongs of the inner pad, and the
rear of the outer pad (this should prevent any squealing). |
|
10
|
Fit
the new inner pad into the piston - avoid contaminating the pad surface.
Thread the wear sensor wire through the caliper. |
|
11
|
Fit the outer pad into part B of the caliper. |
|
12
|
Refit
part A of the caliper, and tighten the bolts. Refit the retaining spring |
|
13
|
Slide
on the new wear sensor, and reconnect the plug. |
|
14
|
Gently
depress the brake pedal a few times, then check the tightness of the caliper
bolts and security of the retaining spring. |
|
16
|
Refit
the wheel. I like to check roadwheel bolts with a torque wrench 100NM
is the usual for a steel wheel, less for an alloy. |
|
17
|
Remember
to bed the pads in, braking gently for the first 100 miles or so
|
|
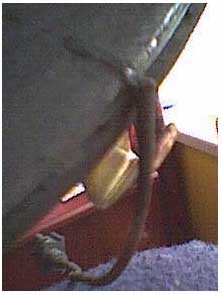
It
is also usual for the brake wear sensor wire to cut all the way through
(check your's every time you get under the car, it's on the drivers side)
|
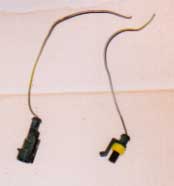
And
here¹s why my wear sensor didn¹t work only 1 strand is holding the wire
on! Because of the way the wire had been routed, the disk wore through it
before the sensor contact was exposed. |
|
|
|
This
is the broken wire when it is off of the car
|
|